If you follow the site on Instagram, you’ll have seen that towards the beginning of the year I began working with Grant at Honed Developments in an attempt to better the suspension geometry of my Civic. Truth be told, I hadn’t spent too much time on this facet of the build, as other more pertinent issues had to be dealt with first. However, once Grant reached out to me and offered to provide both product and assistance, I jumped at the opportunity to tackle everything at once – I mean, how often do you get two engineers well-versed in Honda suspension volunteering to help you setup your car?
Honed is an Australian-based, aftermarket suspension component producer founded by Grant and Tom; engineers by day, time attack enthusiasts by…well, also day. Having personally driven at tracks around the Melbourne area for several years, they are able to gather first-hand data on a variety of suspension modifications. Their products are engineered with the intention of correcting the suspension geometry of late model 90’s Hondas; the chassis’s that are obviously very popular for all forms of racing. The double wishbone front suspension of this particular era has been capitalized on to no extent, but Honed is taking one step further. Grant and Tom take their track-tested modifications to the suspension arms, and make them readily available for any enthusiast to bolt on their projects and allow them to easily take advantage of the benefits that come from corrected geometry, and thus make the most of their tire. If that wasn’t enough, they also provide the knowledge and reasoning behind the ‘why’. Explaining what the product does is just as important as offering the product itself, and on the Honed website you’ll find a library of resources that explain what’s going on with your suspension while you drive around a track.
I went into this review with a more collaborative mindset than most (not that I do these all the time), as I wanted to make the most of Grant and Tom’s background in engineering as I idealized my car’s suspension setup. I had a chance to collect a lot of data on my car, and by capitalizing on this, I actually learned quite a bit. The majority of my communication was with Grant who was very patient with my naivety, as this was the first time I’d ever plotted out bumpsteer and I had lost my most recent alignment data (oops), and had responded to all my emails very promptly and in full, answering questions and offering suggestions where he could. So, why was I initially interested in this product?
An adjustable tie rod kit becomes beneficial if you’ve lowered your car more than 30mm and even more so if you have after market upper control arms and modified suspension geometry for greater caster or a non factory combination of parts (i.e. EG/DC parts in an EK chassis). All of which I currently have on my car. As the suspension compresses, or moves vertically, the wheel will either steer left or right. This effect is termed ‘bumpsteer’ and is generally a negative thing, as it reduces tire grip. It’s also something you’ve probably felt in your car, whether you realized it or not. This kit is designed to allow the height of tie rod end to be adjusted to correct for the drop in height caused by inclining the knuckle for greater camber and castor, thus fixing the geometry. Honed believes that it is a common misconception that the steering arm wants to be horizontal or parallel with the ground. That is definitely not the case for a double wishbone Honda chassis and unfortunately, some other after market companies have not understood this and sold parts to the Honda community which have failed give any performance benefit and ultimately given adjustable tie rod kits a bad name. Honed is looking to fix that.
 In unboxing their shipment, it was clear right away that this was a very comprehensive, well thought-out kit. Quality aftermarket parts with a solid design, paired with OEM components, and detailed instruction not only made the kit look good and complete, but also provided a confidence in the product that would leave any skeptic devoid of doubt; you just know high quality parts when you see them. Suspension components play an inherently important role in how your car handles, and how well you can control and predict it’s movements. Throw in the safety factor, and you have a system that you do not want to cut corners with. Simply stated; suspension is essential for a safe and fast car.
 I started simply by measuring the distance between the center of the front hub, to the top of my fender. This number will be different for each car, as each car has varying ride heights and fender positions, but it’s a number needed for each specific case. Mine happened to be just over 304mm. So, with the car off the ground, I’d be able to jack the knuckle up to my current ride height. Here is a photo I took one handed trying to illustrate this measurement (poorly).
  The OEM tie rod in all it’s glory. I should say that at the time of the install, I had already been using a front roll center adjuster (extended ball joint). This is all taken into consideration in our results, because the RCA helps to compensate for the already lowered ride height.
 When measuring bumpsteer, you want to remove the spring from the coilover assembly. You do this to get full stroke from the shock. If you were to leave the spring on, you’d very quickly begin raising the car at a certain point. Once the spring is removed, reinstall the shock back into the car and bolt everything back up, save for the sway bar linkage (if you have one).
 I’m lucky enough to have a shop mate that works at a factory-backed race shop, and as such, was able to borrow their gauge for a night. Like I mentioned previously, this was the first time I’ve done this measurement, so there was a bit of trial and error involved to get it consistently accurate. Once the gauge was set up, I went through the motion of adjusting compression and droop, and recording the toe numbers with the OEM tie rod in place.
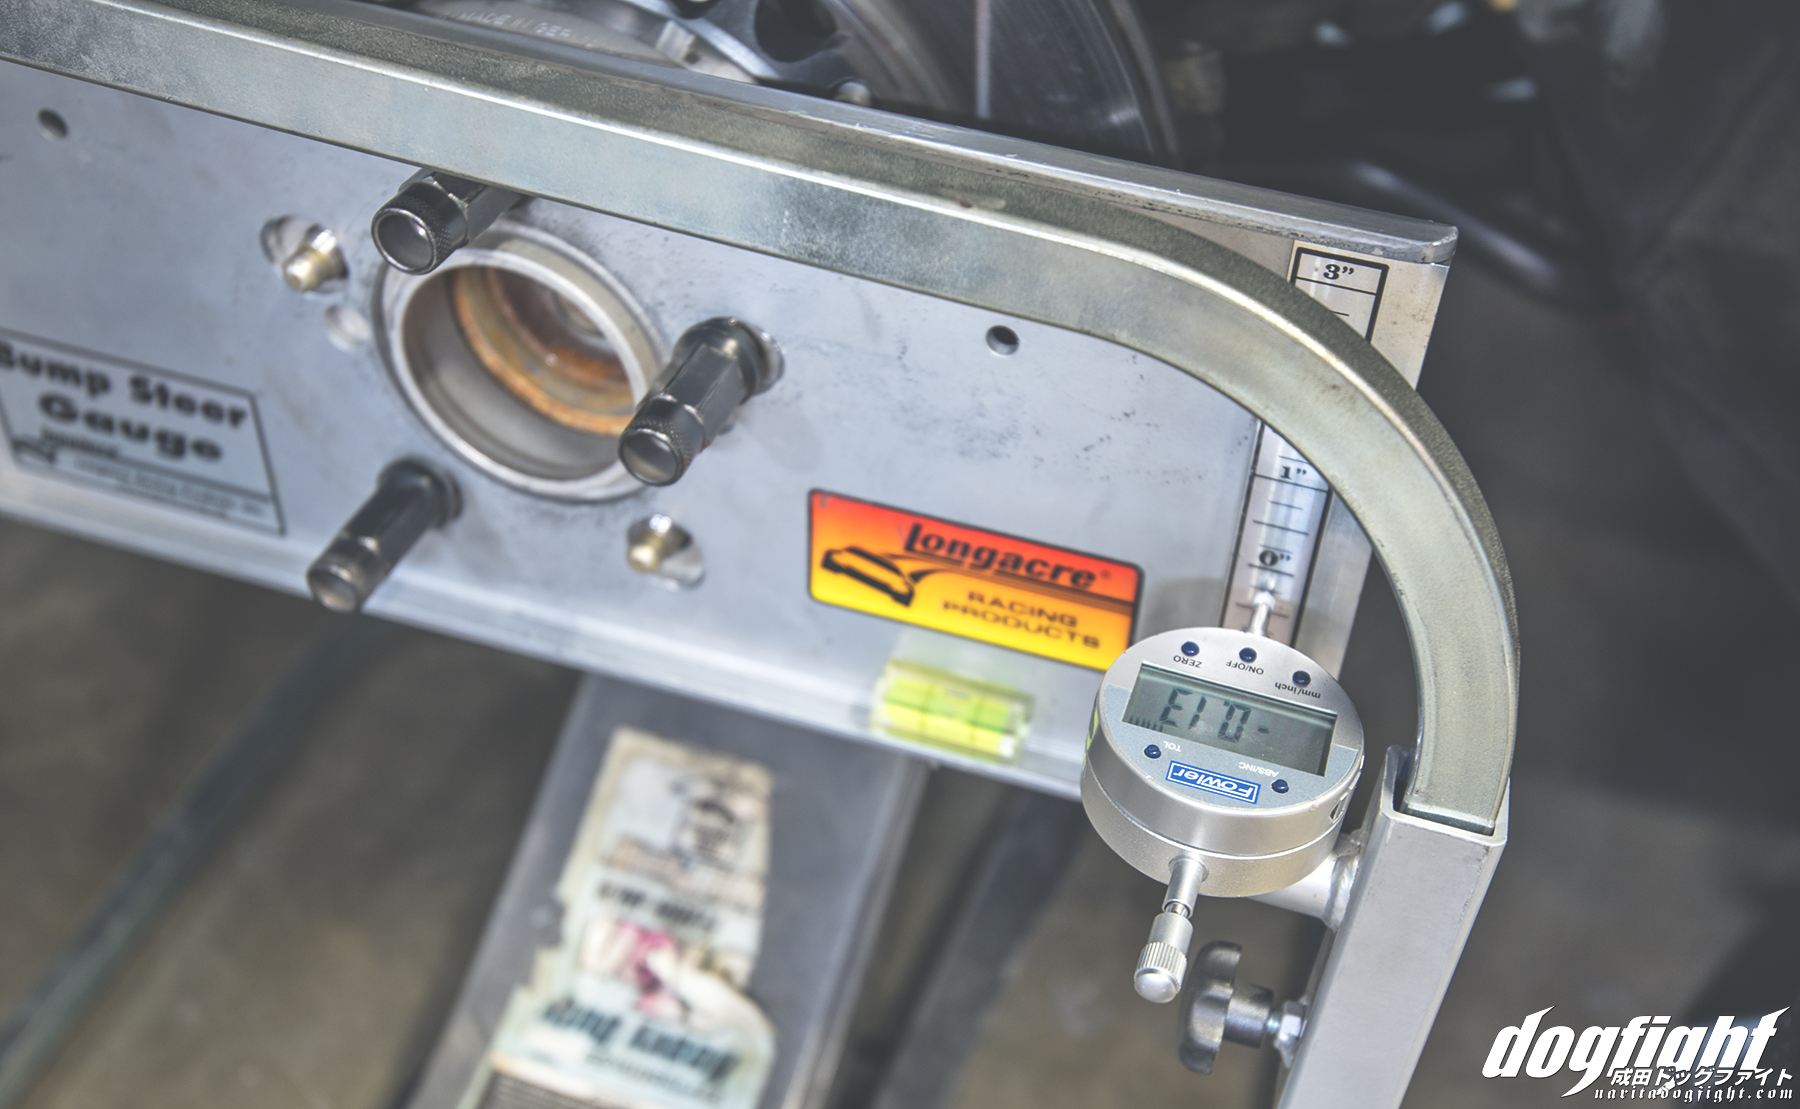 As the shock is compressed, you’ll see the toe change on the gauge. I recorded each change for every 1/4 inch of travel, and sent the data to Grant at Honed, who was nice enough to plot everything on a very easy to read graph. We also used data they had collected from other setups and vehicles to compare my data to.
 Once I had collected the numbers from the measurements using the OEM tie rod, I went ahead and assembled the Honed part. Dom (@domcouver) and Kristian (@studytuned) were on hand to assist and provide good company.
 With the Honed tie rods assembled to the length of the OEM tie rod, I could now add the spacers to correct. Keep in mind that plotting the bumpsteer is not necessary to use this kit! – Honed has already done all this for you. This is just something I wanted to do to better understand what my specific car is doing while I’m busy trying my best to keep it between the curbs. Included in the kit is a chart that outlines the recommended amount of spacers to use based off of a variety of factors including ride height and other ancillary suspension components already installed.
 I installed the new tie rod, marveled at how nice it looked, and then went on to measuring the toe throughout the spectrum of ride heights. I started with no spacers, and worked my way through to the highest setting. Right away, just in the numbers, it is easy to see how much this will affect the toe at varying shock compression. Even though I could see that at the most spaced setting the toe was very greatly effected, I wanted to have a full picture of what the kit is capable of, so I measured it anyway. Here, you can also see the existing RCA’s that were on the car. Honed also makes a kit that you can purchase on their site individually, or as a full front and rear kit to encompass a three part geometry correction kit.
 Measuring the new tie rods and recording the data, which could then be put into a fancy graph that’s easy to read:

This is the graph with the 64 some-odd data points I gave Grant (note I measured their tie-rod without using a spacer – as a disclaimer, the part is not intended to be used without one). In this initial graph, as the rod end is raised, you can see the “elbow” of the toe curve is moved upward and to the left. This in the real world is changing the steering geometry to have greater linearity with a more “toe out in bump” trend. Honed has gained an understanding through the years of tuning FWD Hondas that there is a ‘sweet spot’ and if a cars toe curve falls within this area the car maximizes the grip of it’s front tires (quantified though absence of understeer, tire wear pattern, temp readings etc), the car is stable at speed and the front end is communicative to the driver.
Rotating the knuckle back for more caster or inward for more camber the steering arm pivot point is moved downward. The Honed Adjustable Tie Rod allows you to compensate for this by raising the pivot point back up again and keeping the toe curve in the ‘sweet spot’, so to say.

A magnified, overlaid graph that shows various curves from other tests, as well as my OEM data. This gives you an idea of what the OEM tie-rod looks like in comparison to other applications; the S2000 line being somewhat ideal.
With the new tie rod installed and spaced accordingly, I moved on to the rear.
 As an added bonus, Grant also sent me their newly finished rear roll center adjustment kit. As far as I know, this is the only offering of this product on the market for this application and I honestly didn’t know anything like it existed until talking to them. As I was replacing almost every component underneath the car, it was an ideal time to also install these – I thought why not include this install in this post as well.
 I had just replaced my trailing arm bushings, and toe links with spherical alternatives, so naturally, I installed the entire assembly only to realize I had forgotten to install the Honed RCA kit. So, while not ideal, I ended up leaving the trailing arms on the car for the installation. Honestly, it wasn’t that bad if it’s something you had to do – given you have the correct tools.
 I had taken these photos during the install of the other parts, in an attempt to collect photos for another post about my slow-to-develop car. It wasn’t until it was all put back together that I realized I had forgotten something…
 So with the arm still in, I disassembled the rear brake caliper and rotor and moved aside the brake dust shield. You have to trim a small portion of the shield for the kit to fit, but it’s an easy fix with some sheet metal shears.
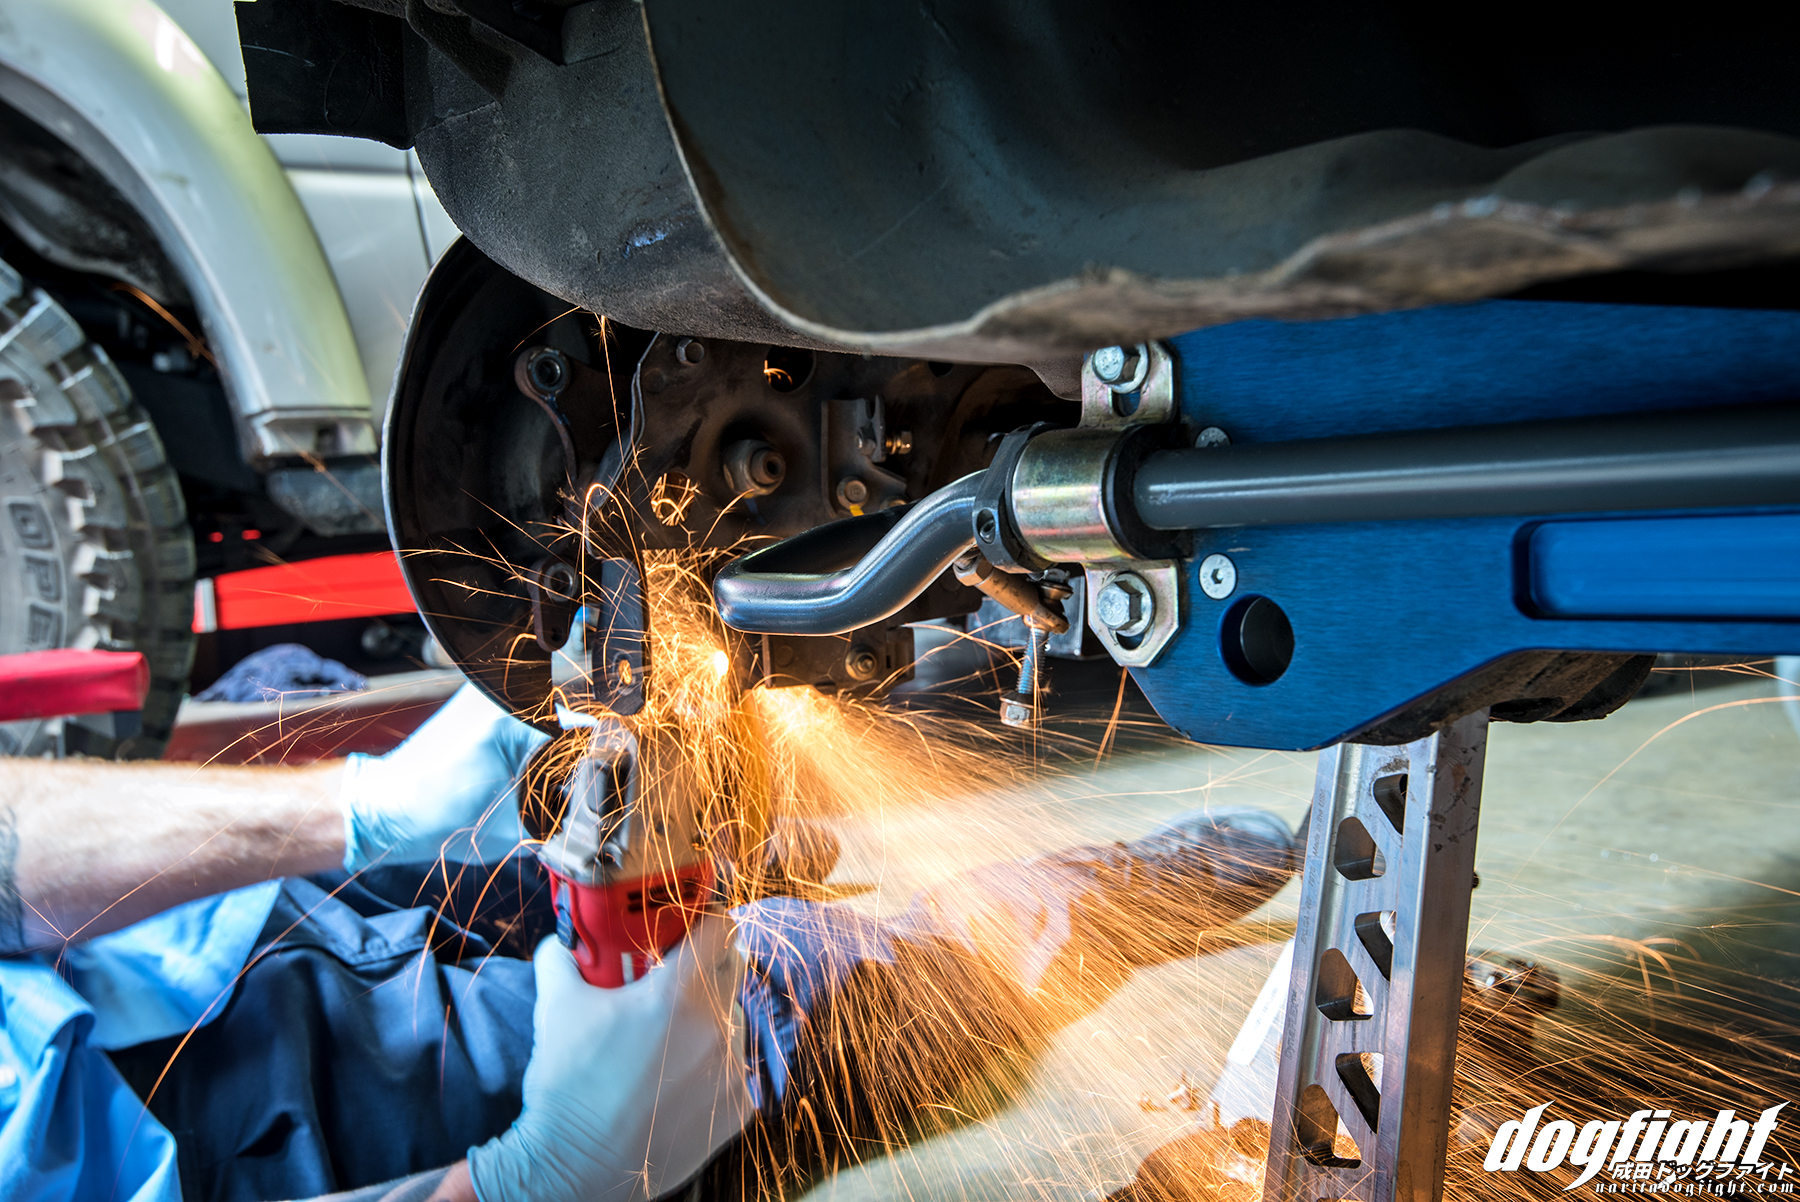 Ahh, yes, my favorite tool in the shop. Our air compressor was down, so I had to use the electric variant of a grinder, but a grinder nonetheless. There is a welded nut on the back of the arm in which the lower control arm bolts to. That nut needs to be ground off, and a small portion of the bottom of the arm needs to be trimmed for the new part to be fitted.
 Knowing that you have to permanently modify your rear trailing arm to install this kit can be a bit unnerving. Again, though, Honed delivers in the quality department and after inspecting the kit, I wouldn’t be apprehensive of using it. Clearly, because in the previous picture I’m cutting my trailing arm.
 Here is the back of the arm with the nut ground off…I ended up sanding it a bit and painting over the exposed metal.
 Here is the bracket just slid over the freshly trimmed arm.
 With the bracket loosely bolted in the existing hole, I ensured the hub and bracket were parallel to one another and drilled another hole for the top of the bracket.
 I went out and got new rotors, not because I needed them, but because I spent so much time cleaning up the components in the rear that putting the old rotors on would be an injustice to my time. I rid the components of brake dust and dirt, using an entire bottle of brake cleaner and liters of parts cleaner and then reassembled everything to see where we were at.
 With everything bolted together, you can see where the LCA would normally be bolted to the trailing arm. When the car is put back on the ground, the arms will compress and set themselves back at more ideal angles given the lowered ride height. I needed to adjust the coilover to compensate for this new geometry…but out of curiosity I didn’t.
 Both sides assembled featuring a lot of very fine dust from Chuckwalla Valley Raceway plastered to every inch of the bottom of my car.
 I bolted everything back together, went through the cars entire under-body once again to make sure everything was torqued and checked that all the castle nuts had new cotter pins.
 A somewhat relevant picture of my car with everything back together.
 Back on the ground I confirmed that you do, in fact, have to adjust the coilovers to compensate for the new pickup point. I raised the rear back to the old ride height, and that was that.
I’ll be following this post up with some feedback with the car on track, after a proper alignment and a few more suspension modifications that I’ve yet to install; stay tuned for the end result. Many thanks to Grant at Honed, and Dom at GMG Racing for the assists. We’ll have an NDF Podcast soon with a whole plethora of information about Honed and Honda suspension in general, coming up in the next few weeks, as well as another few episodes in the works. If you have any questions about the kit, or Honed products in general, feel free to reach out to me, and of course directly to Honed. Enjoy!
Discover more from
Subscribe to get the latest posts sent to your email.
On the front toe/bump steer thing, wouldn’t you want as little deflection as possible? Like the graph for the one setup shows? It looks like the honed kit causes the wheel to move more. How is that ideal? I’m sure they know what they’re doing so I have to be misunderstanding something.
Hi Chris,
I reached out to Grant to get you a more articulate answer than what I could provide – hang tight, he said he would respond direct.
Hi Chris, because Sean’s car is still running stock caster (It’s actually probably got slightly less that stock caster now that it’s lowered) and extended ball joints his toe curve was not overly detrimental ie it didn’t exhibit a toe in with bump trend. Sean could probably have achieved reasonable turn in by running static toe out with the oem tie rods. However compared to the set up he has now with our tie rod kit he the car would be a bit more vague in a straight line, requiring minor corrections to keep straight at high speed, it would more easily tramline and would really work (heat) the front tyres. With static toe out you are scrubbing the tyres as you travel in a straight line. We tune the steering geometry to toe out under compression and run 0 toe at ride height. This gives the best of both worlds. When your vehicle is travelling down a straight the wheels have 0 toe, the tyres aren’t scrubbing and the car doesn’t try to self steer. Then in the corner entry phase, when you are trail braking and have forward weight transfer, the front suspension is compressed and the tyres benefit from less slip angle on the outside tyre and more on the inside tyre.
See I knew I was misunderstanding something. Thanx for explaining I get it now. For whatever reason I was thinking only in terms of hitting a bump or something and not compression due to cornering. Getting rid of static toe out while keeping its benefits sounds like a fantastic idea! Keep up the good work!
Chris you are right. Ideally, you want as little bump steer as possible, and the stock geometry clearly shows that. And, yes, I am a mechanical engineer, so I do know what I am talking about, and I know exactly what the ideal bump steer curve should look like.
The point of the RCA is to offset the wheel hub, so that the geometry is closer to stock on a lowered vehicle. It looks like the RCA did it’s job nearly perfectly.
It’s really easy to understand how the tie rod should be angled to eliminate bump steer completely. You just draw an imaginary line from the pivots of the upper and lower control arms. Where these lines intersect is your instant center. You want to align the tie rod, so that it is aligned with the instant center.
This image shows what I’m talking about. http://www.hotrod.com/articles/ctrp-1001-bump-steer-explained/