
This past weekend I was able to knock out a lot of work on the car. For whatever reason I had this idea in my head that the rest of the build would be smooth sailing after the new motor setup got tuned; boy was I wrong. Getting the motor running properly was a huge milestone, but it far from marked the completion of the build. There is still much to do, and among them was to replace the overweight front calipers with a reliable, lightweight alternative – APG Performance answered that call.
I first learned of APG from Shinobu Matayoshi’s time attack FD. I had ran into him at Suzuka and noticed that the calipers on his car were not among the commonly seen variety. When I got back home I looked into them a little more with little luck. I eventually ended up contacting Matayoshi a couple months later to talk about his car, and ended up getting contact information for reps at APG. Long story short, I was able to meet with Howard, who runs marketing for APG, while he was here in the states for work. We got together at my shop and discussed a few things in regards to braking. I explained to him that I wasn’t very disappointed in the way the OE Legend calipers worked for me (aside from them being single piston), noting that the massive weight was my main concern. After hearing that the smaller variation of their 6-pot caliper weighed in at just 7 pounds with pads, I was pretty sold. Single piston Legend calipers are just over 14 pounds loaded – I’d be cutting that weight in half. Not to mention that it fits a 304mm rotor, which is just a tad larger than the 11.1″ rotors I had been using. I would be able to address the weight issue, and get a more even and consistent brake feel at the same time. We settled on the setup, and a few weeks later Howard was able to deliver them to the shop before he leaves back to Japan and Taiwan later this week. I thought I’d do an install post for both my benefit of documenting the comparison, and a little how-to if any enthusiasts out there have yet to tackle their brakes.
 The next day, a small bout of rain during the late afternoon brought a nice moment of reprieve from the horrendous heat wave we’ve had this week in California. I wasn’t going to get a better break in working conditions, so I figured I’d start disassembling my current brakes.
 I’m sure the majority of people reading this have swapped brake pads, rebuilt calipers, and replaced rotors at some point in time. For that reason, I’ll do my best to be concise in instruction for those that haven’t and our interested – so if I skip anything I apologize, but feel free to contact me with any questions you have, product or installation wise. This is the old setup I had on the Civic; Legend single piston calipers, Project Mu HC+ pads, and blank rotors (the setup is for sale by the way). For all intents and purposes this was a solid setup, but in my quest to shed as much weight as possible it just wasn’t going to cut it anymore.
Anyway, it’s very easy to remove calipers on Civics. There’s just two 17mm bolts that hold the assembly to the knuckle. Remove them, along with the 10mm brake line and you can take the whole caliper off with little effort.
 With the old caliper off, I was able to take some comparison shots for my own records. Like I stated previously, the new APG calipers weigh 50% less than the OE cast ones. At just 7 pounds, just holding them in my hand the difference was staggering. Comparatively the two aren’t sized all that differently, with the APG calipers being just a bit more narrow and longer to accommodate the 6 pistons.
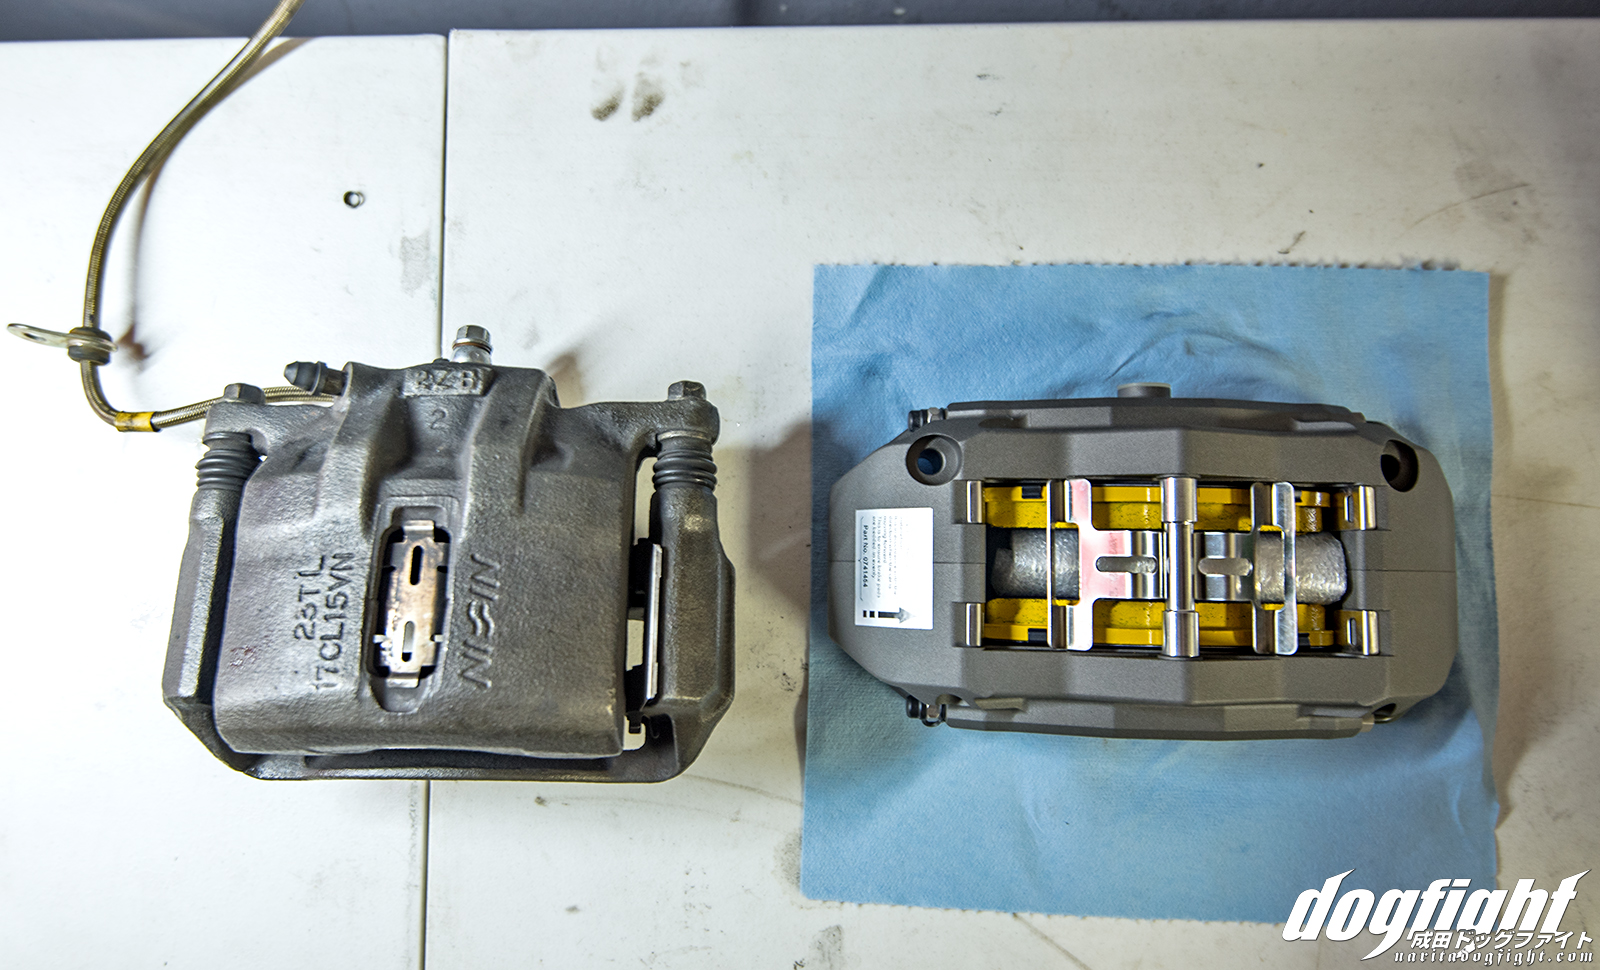 Here you can see the difference in length a bit better.
 With the caliper off, you can go ahead and remove the rotor. Some of you may have the small set screws (2) that help adhere the rotor to the hub. You’ll need an impact driver to remove those if you still utilize them – I don’t. If you don’t have one, I think Autozone rents them, or you can just buy one; they aren’t that expensive and it’s a nice tool to have.
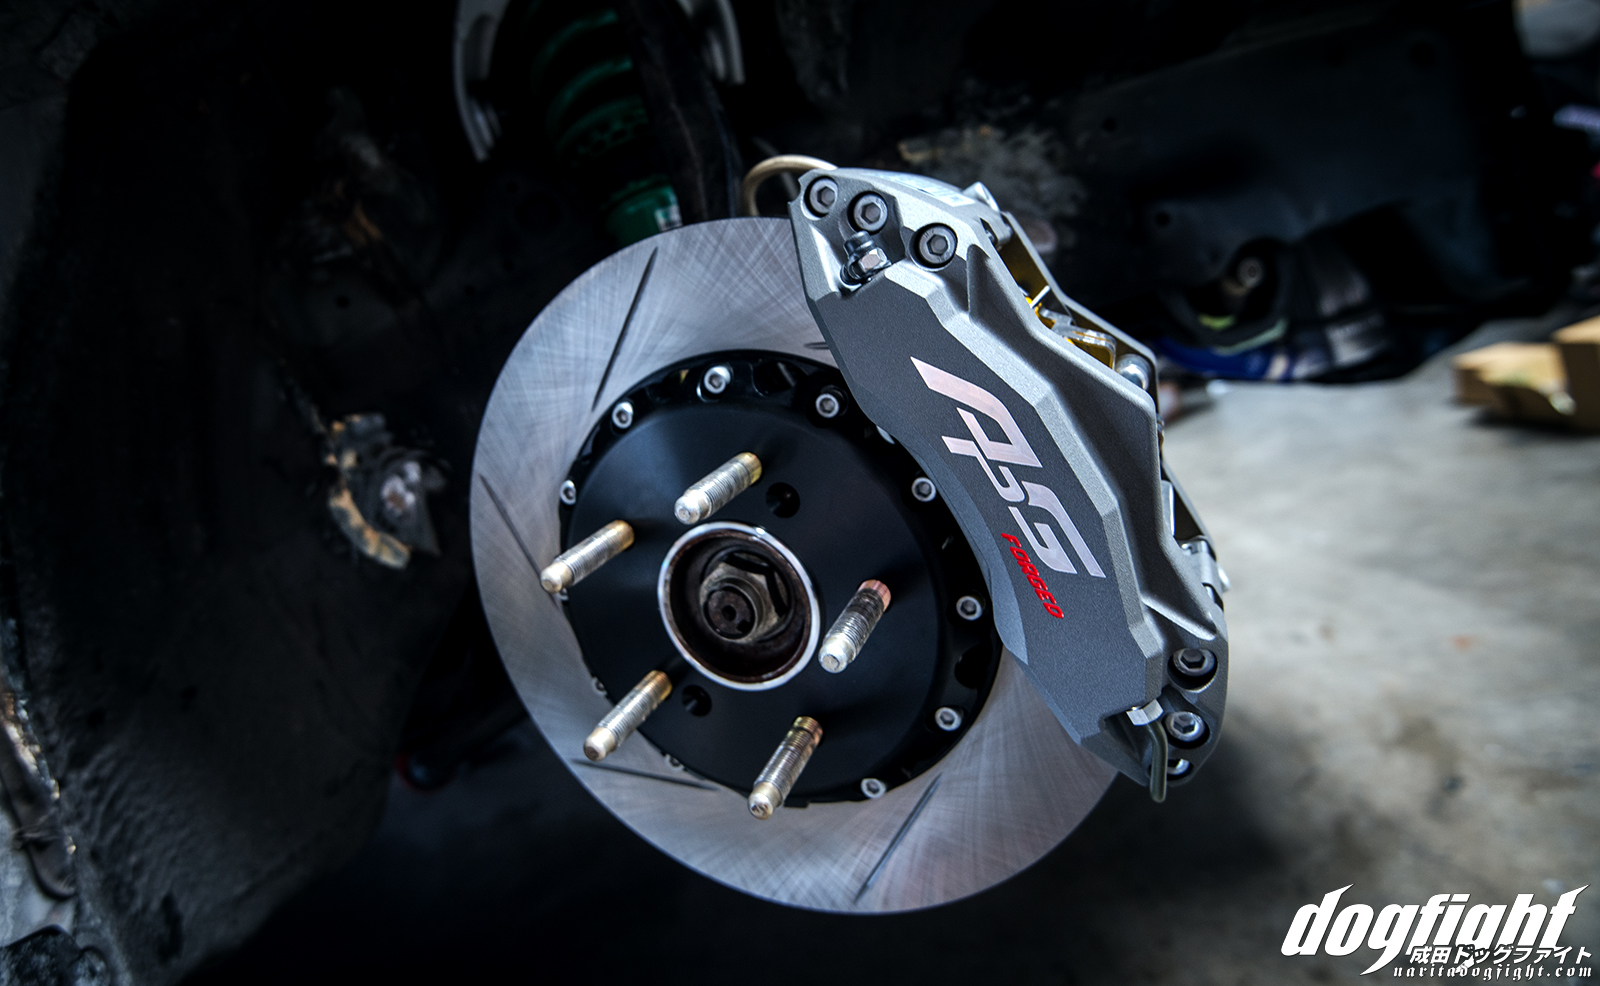
The OE blank rotor I was using is an 11.1″ and the new APG slotted rotor is a 304mm (roughly 12″). It’s actually a really good size for this particular application. It’s never a good idea to exceed the braking threshold for the tire you’re using and the same thing generally goes across all chassis’. With how light my car is, and the tire size I plan to use, I would probably never run anything larger than a 304mm rotor. The APG rotors are a two piece design, which brings many advantages. For one they are roughly 15% lighter than the solid counterpart (depending on what you’re replacing), and they dissipate heat much more efficiently. When the time comes to replace the rotors, just the ring can be replaced and the hat’s can be reused.
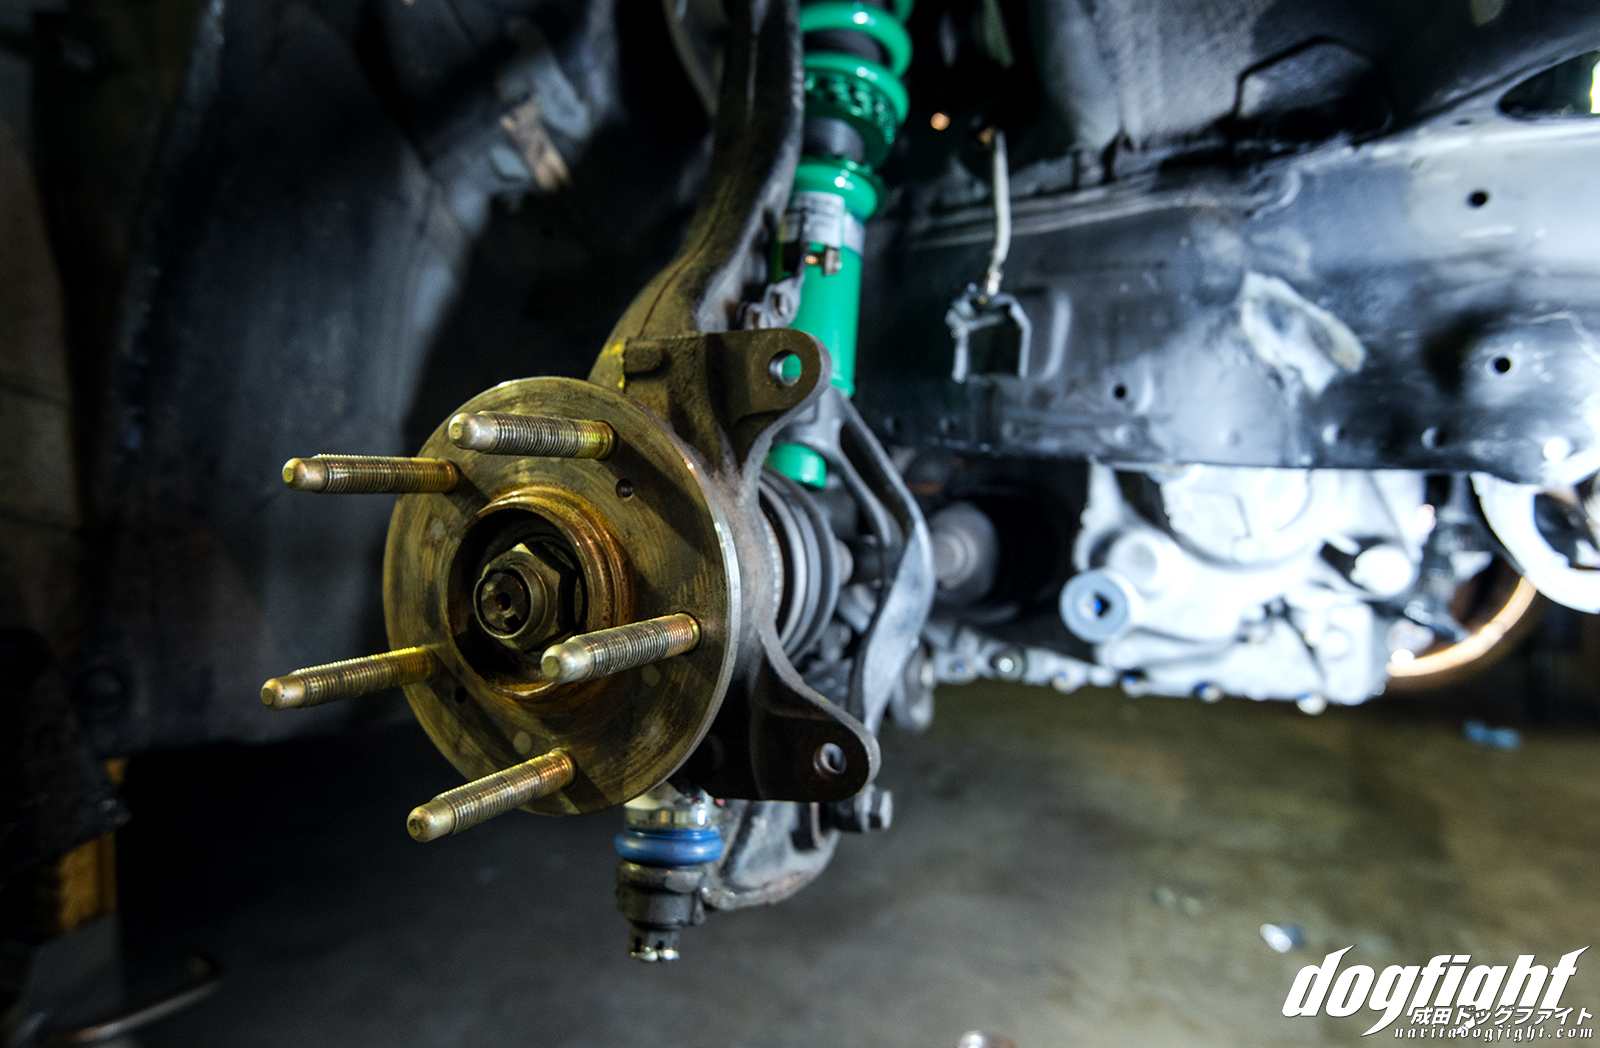 Here is a shot of my hub and knuckle sans any braking components. Now is a good time to inspect the components without anything impeding your vision.
 It’s also a good time to stop and take a break for the night because you’ve been working on the car for the past 8 hours. Or in my case, because you still need to hammer the fender well in to accommodate a bigger tire.
 Fast forward to Monday evening. With the old brakes off and stored, I cleaned the table and laid out all the components of the new kit. Each APG kit is truly all-inclusive. Aside from brake fluid (and tools of course), there isn’t anything extra that you’ll need for the install. Now is a good time to note that everything fit like a glove. Machining for the parts was spot on for the application.


 Since I didn’t have the set screws, I just screwed a lug nut on one of the studs to hold the rotor in place while installing. I use brake cleaner to clean off the rotors before putting the calipers back on as a rule of thumb.
 Before installing the new calipers, it’s necessary to fit the brackets. This allows brake companies to make a universal caliper design that can be fitted to many different applications.
 With the supplied hardware and threadlocker (which is basically Loctite Red). Don’t forgo the use of thread lock – the last thing you want is your caliper to come loose on your drive to the track, at the track, or driving home. I can speak from personal experience on this. I had the top caliper bolt loosen on track a few years ago, and on the drive home, back completely out and plop down onto my inner barrel. I sheared off all my wheel weights, and put a nice gauge on the inside of the wheel – but it could have been a lot worse.
 With the bracket in place (it only lines up one way), just slide the caliper over the rotor and bolt it onto the knuckle. Already looking better.
 The kit comes with new Teflon SS lines, but I had no reason to change as my Earls lines were still good, and I had already modified the holding tab to fit my knuckles. Make sure you’re utilizing the two crush washers on the banjo fitting leading to the caliper. Once you have both sides fitted, give the steering wheel a turn from lock to lock and make sure the brake line isn’t binding or being pulled anywhere. The arrow on the caliper indicates the direction of rotor movement, and each rotor is denoted as right or left with direction as well. It’s important to ensure that each part matches the correct movement for them to function properly.
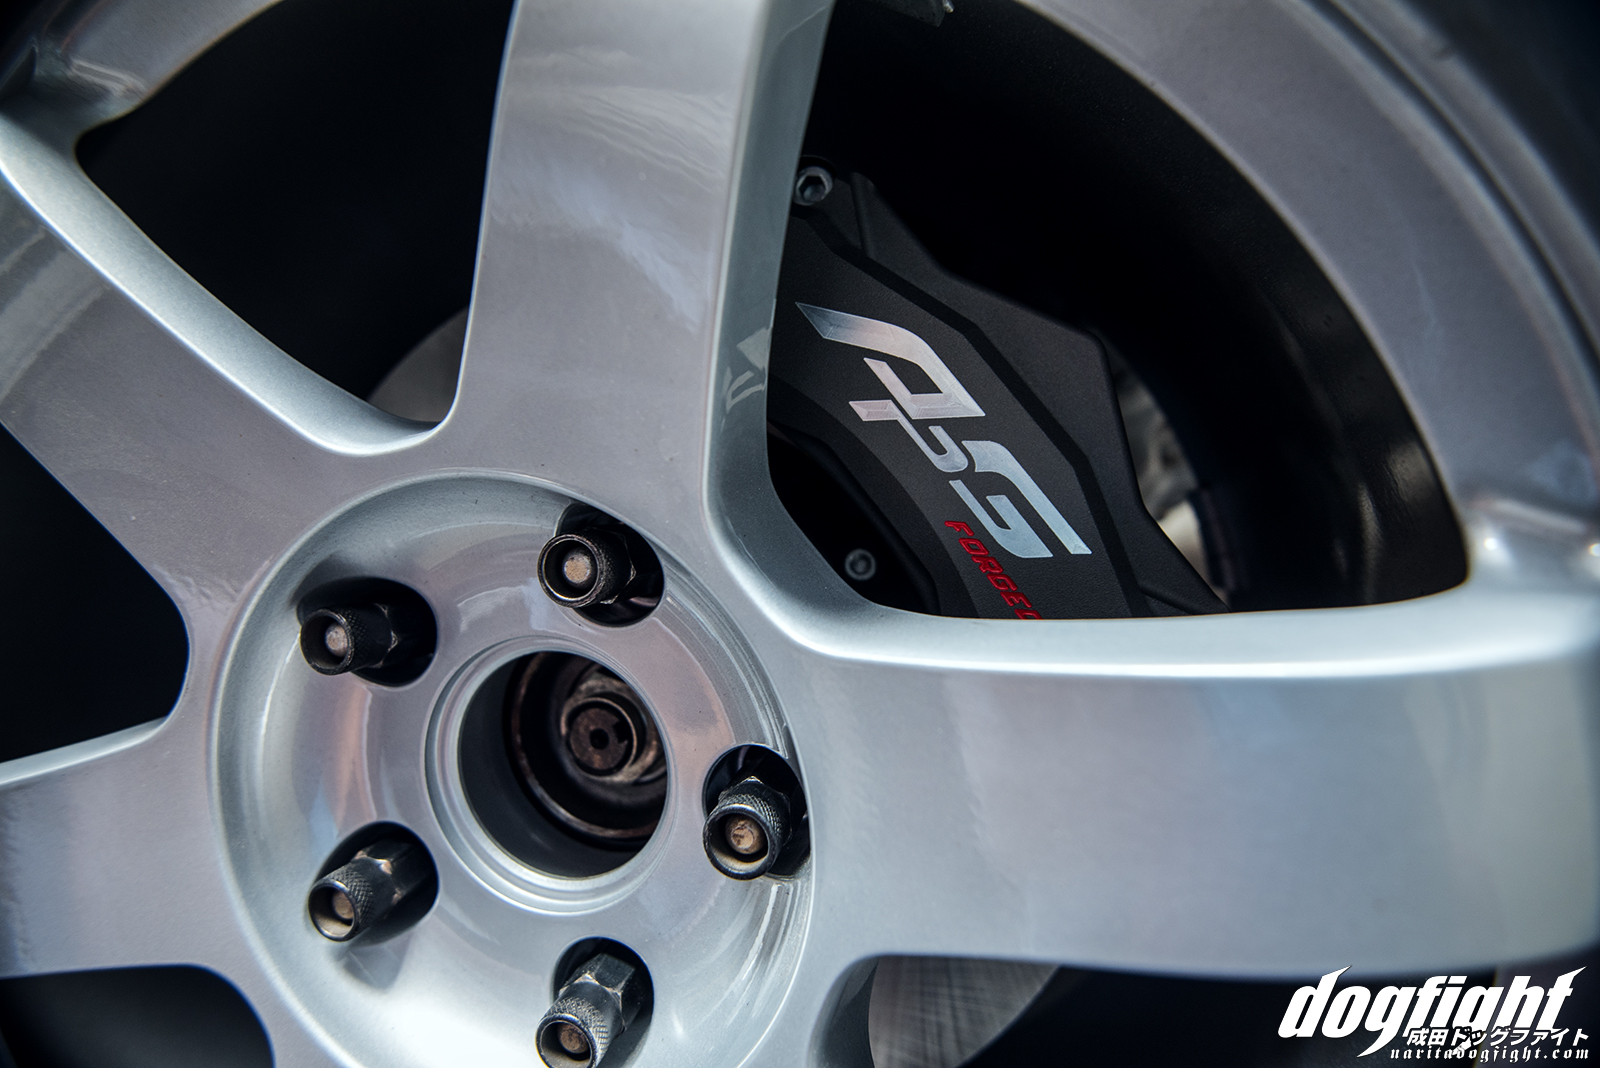
 Quite possibly the easiest thing I’ve installed on the car as of yet, and easily one of the best looking.
 After you properly bleed the entire brake system, you’ll want to bed the brakes accordingly. After cruising around at slow speeds to ensure everything is installed correctly, you’ll want to build up some heat in the system. When I bed new pads and rotors, I usually do a few moderate stops or slowdowns from 40 or 50 mph. The point is to gradually build up heat over time, allow the rotors to cool, and repeat. If you just go nuts right of the bat and slam on the brakes, the excessive, rapid heating can cause uneven transfer. After you’ve done 4 or 5 gradual braking stops, you can do a few hard stops from freeway speeds. There are a ton of different variations to this, but just give it some time before you hit the track.
 It’s no a bad idea to jack the car up after this process and inspect the components for any discrepancies or leaks.

I’m not used to installs going this smoothly on my car. I gotta say it was a nice surprise. I’m looking forward to testing them out during the cars first shakedown – which hopefully comes sooner than later
_________
Pingback:Product Spotlight: APG Performance Brake Install – APG Performance Brake
Reblogged this on APG Performance Brake.
Pingback:PRODUCT SPOTLIGHT: APG PERFORMANCE BRAKE INSTALL – APG Performance Brake
Let us know of the first shakedown…